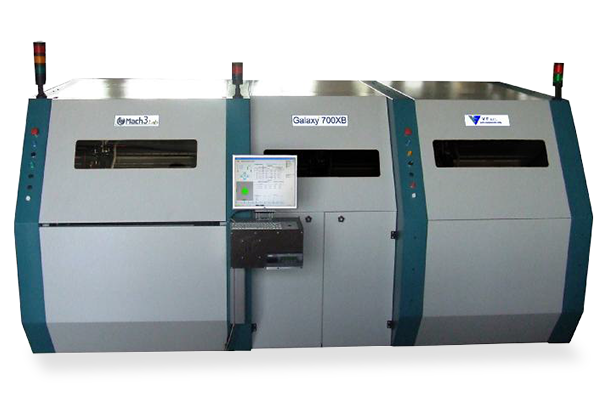
X-ray pins holes drilling, edge cutting-beveling and corners rounding
• Drill reference holes (pin holes) on multi-layer panels.
• Copper Flash cutting and edge beveling
• Corners rounding
• Unloading on trolley

OPTIONS
– Automatic Loading station from trolley.
– Panel thickness measurement.
– Data Matrix Reading
– Micropunch panel ID
– Bar code reader
– Automatic tool change
SPECIFICATIONS
X-RAY station
| Panel clamp | Venturi | Vacuum Area: 208 x 118 mm |
| Max target detection area | 720 x 580 mm. | |
| Max drilling area | 740 x 580 mm. | |
| Forbidden area | 240 x 150 mm. | Central vacuum plate |
| Max. Panel dimension | 760 x 600 mm. | |
| Min. Panel dimensions | 300 x 200 mm. | |
| Panel thickness | 0,3 – 5 mm. | |
| Max. panel weight | N.A. | |
| Max. flash width | Da 10 a 25 mm. | |
| Recommended target diameter | 0,5 – 2,5 mm. | |
| Drilling tool diameter | 2 – 5 mm. | |
| Process time | 30 sec. | 4 targets + 3 holes – Including the panel load by operator |
| Electrical power | 2 KVA | Voltages: 400 and 480 V – 3 Ph – No neutral |
| Air consumtion | 500 NL/min (Avg) | Peak con. 1500 NL/min – Min. Pressure: 6-10 Bar |
Cutting and Beveling stations
| Tools specifications | ||
|---|---|---|
| Cutters for edges | Diam. 80 mm. | V profile disks - Refer to drawings |
| Cutters life time | 10 – 15 Km. | |
| Router for edges | Diam. 60 mm. | Refer to drawings |
| Router for chamfering | Diam. 25 mm. | V profile router - Refer to drawings |
| Dust evacuation | Vacuum cleaner | |
| Process Scraps deposit | Dedicated cart | |
| Working capabilities | ||
| Max panel size | 700 x 700 mm. | After beveling |
| Min Panel size | 305 x 305 mm. | After beveling |
| Chamfering diameter | 5 – 10 mm. | |
| Panel thickness | 0,5 – 4,8 mm. | |
| Max flash width | Da 10 a 25 mm | |
| Max flash thickness | ≤ panel thickness | |
| Beveling tolerance | ± 0,5 mm. | |
| Max stack on output trolley | 200 mm | Height of stack |
| Process time | 60 sec. | Beveling + Chamfering + Automatic panel lay down |
| Electrical power | 10 KVA (Max) | 400 and 480 V – 3 Ph – No neutral – Included vacuum unit |
| Air consumption | 100 NL/min. | Average – Min. Pressure: 6-10 Bar |


